
You can have the sunniest windowsill, the prettiest containers, and the most carefully chosen vegetable seeds and still end up with a sad, stunted harvest. The real culprit, more often than not, is the soil. Indoor container vegetable gardening is a completely different game than planting in an outdoor garden bed, and the soil rules change entirely when your plants live in pots.
If you’ve ever bought a bag of “potting soil” from the store, dumped it into a container, and hoped for the best, you’re not alone. Most of us start that way. But as you spend more time growing food indoors, you quickly realize that not all soil is created equal and getting the mix right is the single biggest factor in whether your container tomatoes, lettuce, herbs, or peppers actually thrive.
This guide walks you through everything you need to know about the best soil mix for vegetables in containers indoors: what to use, what to avoid, how to build your own mix, and how to tweak it for different crops. Whether you’re a beginner or you’ve been container gardening for years, you’ll find something here that makes your plants happier.
Why Regular Garden Soil Won’t Work in Containers
Let’s start with the most common mistake: using regular outdoor garden soil in your indoor containers. It seems logical soil grows plants in the ground, so it should work in a pot, right? Unfortunately, no. Garden soil is designed to work in an expansive outdoor ecosystem where roots can travel freely, drainage happens naturally, and earthworms constantly aerate the ground.
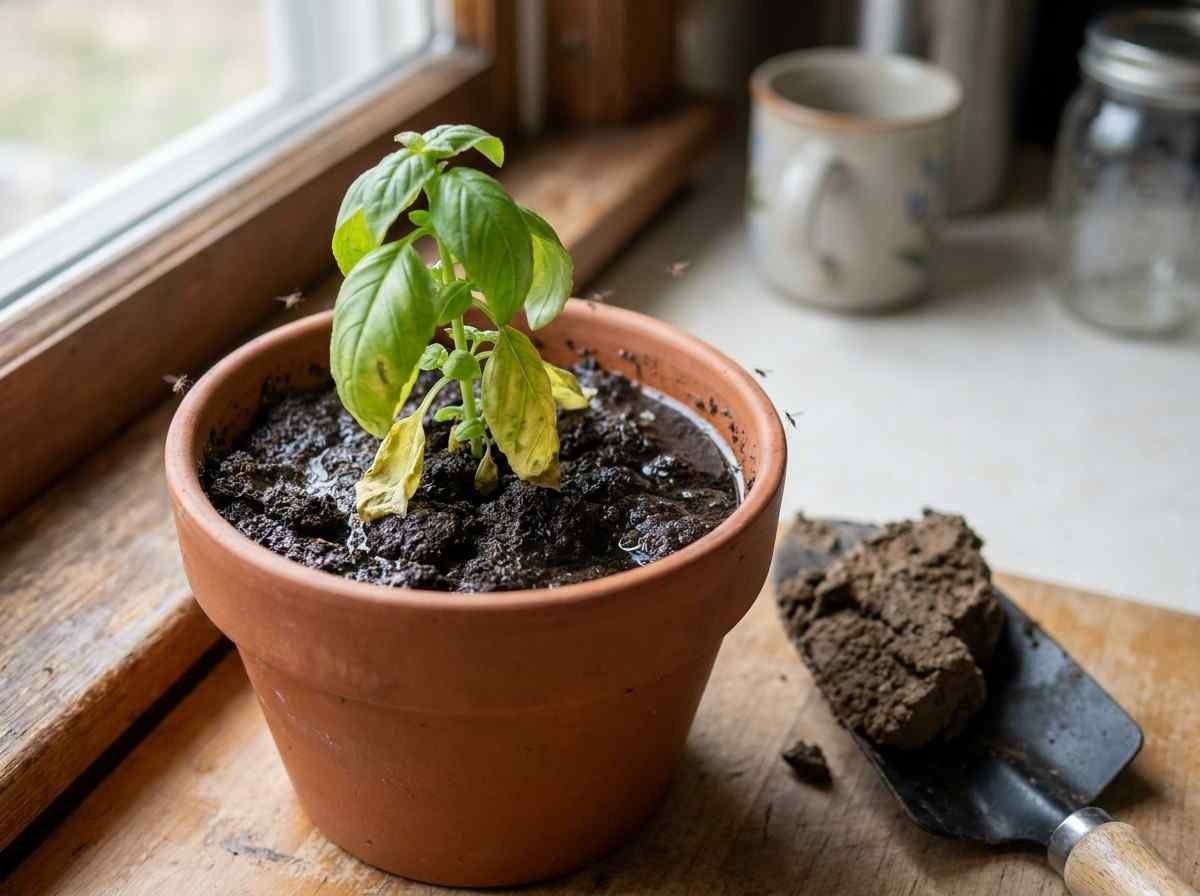
In a container, that same garden soil does the opposite of what you want. It compacts over time, creating a dense, brick-like environment that suffocates roots and blocks water from draining properly. Waterlogged roots can’t breathe, and before long, root rot sets in. On top of that, garden soil often contains weed seeds, insects, and pathogens that thrive in the warm, sheltered indoor environment.
I learned this the hard way with my first indoor tomato attempt. I scooped soil straight from my backyard, excited and confident. Within three weeks, the leaves were yellowing, the soil smelled damp and sour, and tiny gnats had taken over my kitchen. Starting fresh with a proper indoor mix changed everything the plants practically woke up.
What Indoor Container Soil Actually Needs to Do
Best Soil Mix for Vegetables in Containers Indoors needs to balance several competing demands at once:
- Drain well: so roots don’t sit in standing water
- Retain enough moisture: so you’re not watering every few hours
- Stay loose and aerated: so roots can expand easily
- Hold nutrients: containers have no nutrient reservoir like outdoor soil does
- Stay lightweight: heavy mixes stress containers and make moving difficult
- Resist compaction: so it stays functional for a full growing season
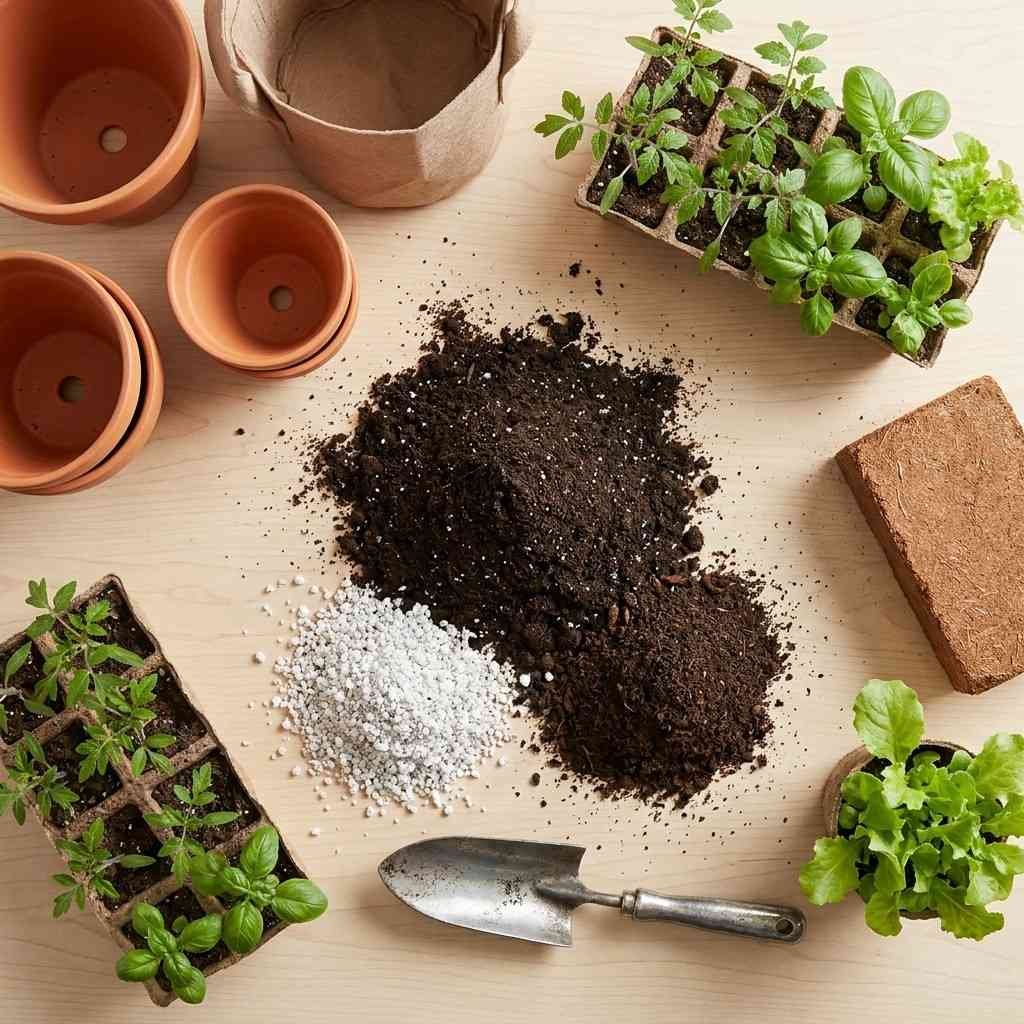
Core Ingredients for Best Soil Mix for Vegetables in Containers Indoors
The best indoor container soil is almost always a blend of several components, each serving a specific purpose. Understanding what each ingredient does helps you make smart decisions — whether you’re buying a pre-made mix or building your own from scratch.
| Ingredient | Primary Role | Key Benefit | Recommended % in Mix |
|---|---|---|---|
| Peat Moss / Coco Coir | Base / Moisture retention | Holds water, lightweight, slightly acidic | 40–50% |
| Perlite | Drainage & aeration | Prevents compaction, improves airflow | 20–30% |
| Compost (worm castings or aged) | Nutrition | Slow-release nutrients, beneficial microbes | 15–25% |
| Vermiculite | Moisture & nutrient retention | Retains water without waterlogging | 5–10% |
| Coarse Sand | Additional drainage | Improves structure for heavy feeders | Optional: 5–10% |
| Biochar | Water retention & microbial health | Long-term soil conditioning | Optional: 5–10% |
Peat Moss vs. Coco Coir: Which Should You Choose?
Both peat moss and coco coir are popular base materials, but they’re not identical. Peat moss is harvested from bogs and is excellent at retaining moisture and providing a slightly acidic pH (around 5.5–6.0), which suits many vegetables.
However, it’s a non-renewable resource, and there are legitimate environmental concerns around its large-scale harvesting.
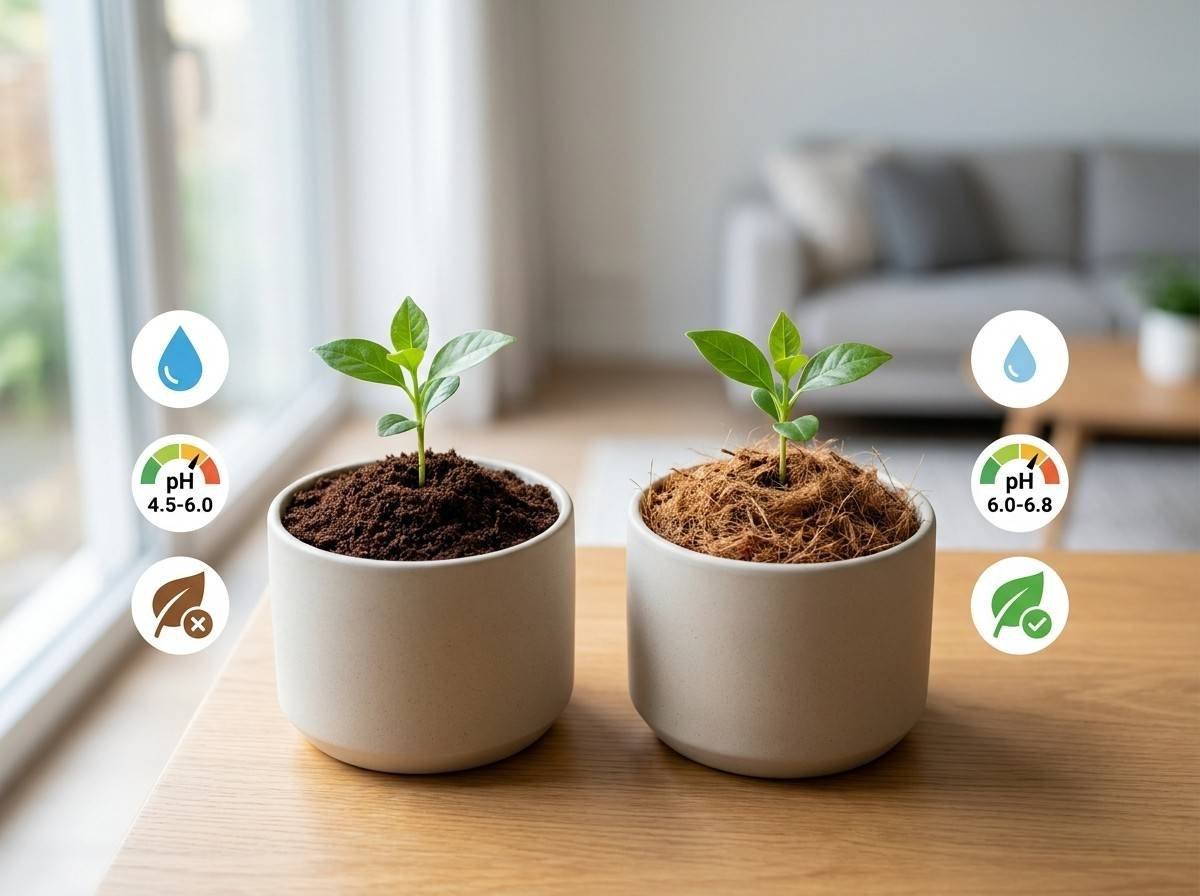
Coco coir made from the fibrous husks of coconuts is a sustainable, renewable alternative that performs similarly. It has a more neutral pH (5.8–6.5), retains moisture very well, and is naturally resistant to fungal issues.
Many indoor gardeners are making the switch to coco coir for both performance and ecological reasons. Either works well; your choice may come down to availability, cost, or personal values.
Perlite: The Unsung Hero of Container Gardening
If there’s one ingredient that separates a mediocre container mix from a truly excellent one, it’s perlite. Those little white volcanic glass beads might look odd, but they do an extraordinary job of keeping soil open and airy.
They don’t decompose, don’t compact, and don’t absorb water, they simply create pockets of air within the mix so roots can breathe. Never skip perlite in an indoor container mix.
The Best DIY Soil Mix Recipes for Indoor Vegetables
While pre-bagged potting mixes exist (more on those shortly), mixing your own gives you full control over the ingredients, pH, and nutrient profile. Below are two reliable DIY recipes depending on your goals.
Recipe 1: All-Purpose Indoor Vegetable Mix
Great for leafy greens, herbs, peppers, and most container vegetables.
- 40% Coco Coir or Peat Moss: provides the moisture-retaining base
- 25% Perlite: ensures excellent drainage and aeration
- 25% Worm Castings or Compost: slow-release nutrition and beneficial microbes
- 10% Vermiculite: extra moisture retention for consistent results
Recipe 2: Heavy Feeder Mix (Tomatoes, Cucumbers, Eggplant)
Boosts nutrient availability for high-demand fruiting crops.
- 35% Coco Coir or Peat Moss: moisture-retaining base
- 25% Perlite: critical aeration for deep root systems
- 30% Aged Compost: rich in nitrogen and trace minerals
- 10% Coarse Sand or Biochar: structural support and water holding
Mixing your own soil sounds intimidating at first, but it’s actually one of the most satisfying parts of indoor gardening. There’s something grounding about understanding every element that goes into your container. Once you do it a couple of times, you won’t want to go back to store-bought mixes that you can’t fully verify.
Best Pre-Made Potting Mixes for Indoor Vegetables
Not everyone has the time or interest in sourcing multiple ingredients and blending their own soil. That’s completely fine. There are quality pre-made mixes on the market that work well for indoor container vegetables — you just have to know what to look for on the label.
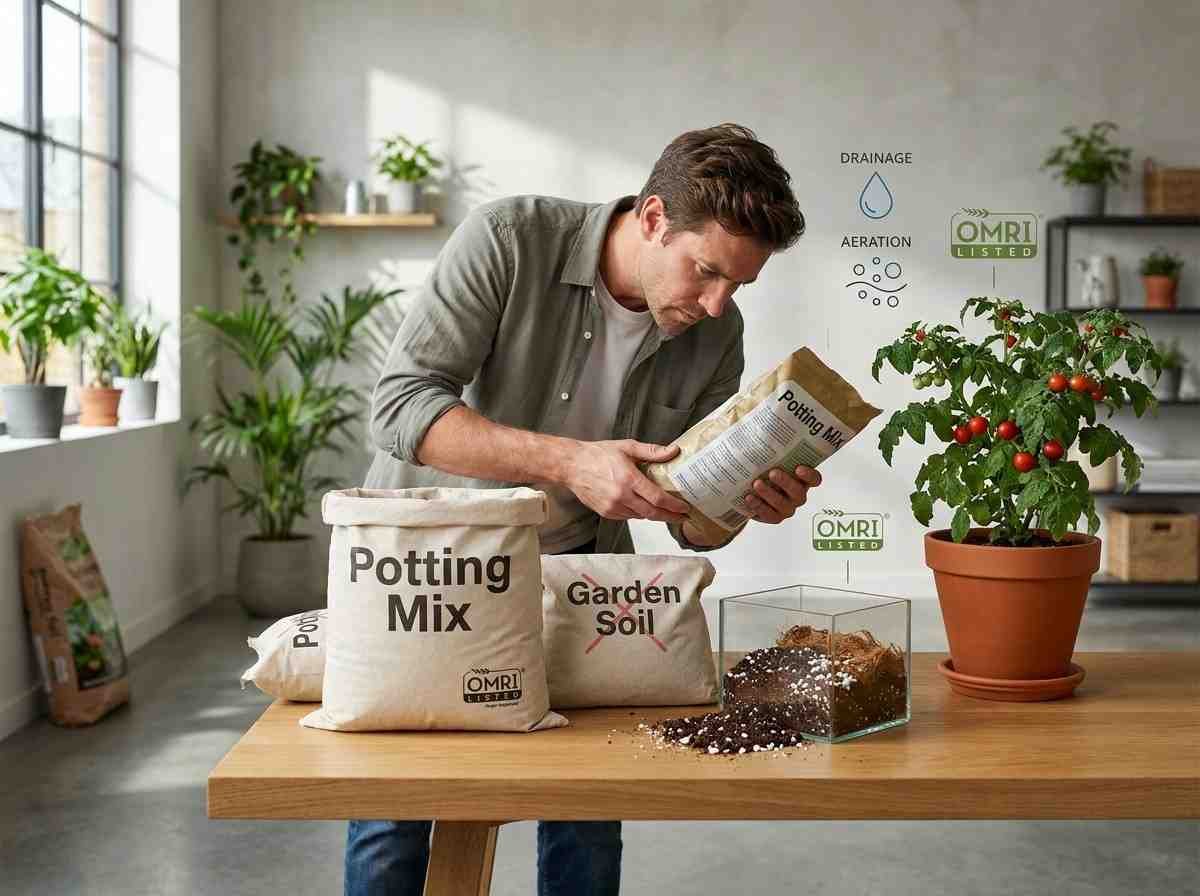
What to Look for on the Bag
- The words “potting mix” not “potting soil” or “garden soil”
- Perlite or vermiculite listed as ingredients
- Coco coir or peat moss as the base
- No added fertilizer, OR a balanced slow-release formula
- OMRI listed if you plan to grow organically
| Mix Type | Best For | Watch Out For |
|---|---|---|
| All-purpose premium potting mix | Herbs, lettuces, greens | May need extra perlite added |
| Seed-starting mix | Germination only | Too fine and low-nutrient for mature plants |
| Cactus/succulent mix | Fast-draining root crops like radishes | Drains too fast for most leafy vegetables |
| Tomato-specific mix | Tomatoes, peppers, eggplant | May be too heavy without amending |
| Organic vegetable mix | Growers avoiding synthetic inputs | Can be inconsistent between brands |
Whichever pre-made mix you choose, adding a cup or two of extra perlite per gallon of mix is almost always a smart move for indoor containers. Most commercial mixes are formulated with outdoor beds or larger planters in mind, and a little extra aeration goes a long way in smaller indoor containers.
Soil Requirements by Vegetable Type
Not all vegetables are created equal when it comes to soil preferences. Some are shallow-rooted and thrive in lightweight, fast-draining mixes. Others are deep-rooted heavy feeders that need a denser, nutrient-rich environment. Tailoring your mix to the crop makes a noticeable difference.
| Vegetable | Soil Texture | Drainage Need | pH Range | Special Note |
|---|---|---|---|---|
| Lettuce / Spinach | Light, loose | Moderate | 6.0–7.0 | Thrives in shallow containers; prefers cooler, moist soil |
| Tomatoes | Medium, nutrient-rich | Good | 6.0–6.8 | Needs calcium; add crushed eggshells or lime |
| Peppers | Well-draining, warm | High | 6.0–6.8 | Sensitive to waterlogging; always add extra perlite |
| Herbs (basil, parsley) | Light, free-draining | High | 6.0–7.0 | Prefer to dry slightly between waterings |
| Radishes / Carrots | Sandy, loose | Very high | 6.0–7.0 | Heavy soil causes forked, stunted roots |
| Green Beans | Moderately rich | Moderate | 6.0–6.8 | Don’t over-fertilize with nitrogen — stunts bean production |
| Cucumber | Rich, moisture-retentive | Good | 6.0–7.0 | Needs consistent moisture; don’t let dry out |
| Kale / Swiss Chard | Rich, medium | Moderate | 6.0–7.5 | Heavy feeders; refresh compost mid-season |
Understanding pH and Why It Matters for Container Vegetables
pH might sound like a chemistry class concept, but for indoor vegetable gardeners, it’s one of the most practical things to understand. The pH of your soil determines how available nutrients are to your plants. Even if your soil is packed with compost and minerals, a wrong pH level can lock those nutrients away so your plants can’t access them.
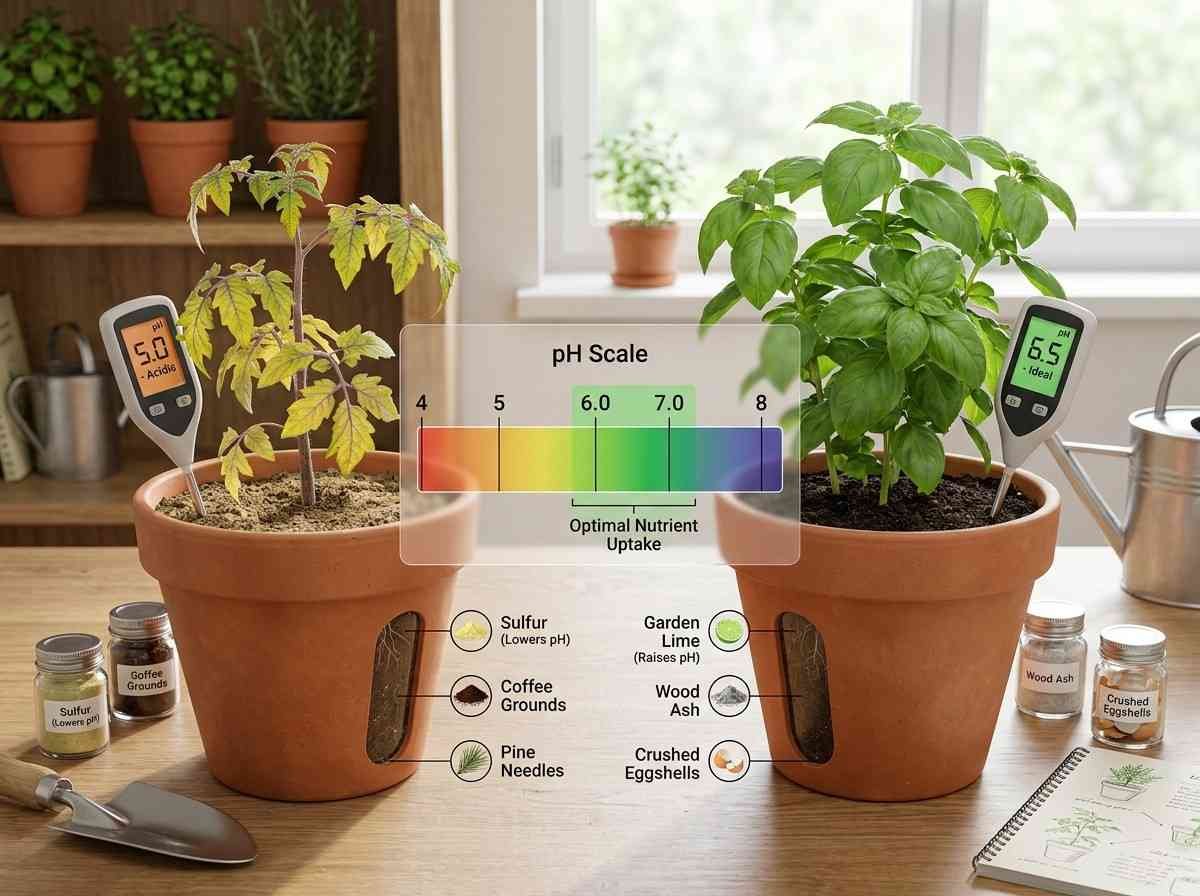
Most vegetables prefer a slightly acidic to neutral pH, somewhere between 6.0 and 7.0. Below 6.0, certain nutrients like phosphorus and calcium become less available. Above 7.5, iron and manganese deficiencies become common, showing up as yellowing between leaf veins (a condition called chlorosis).
Quick pH Adjustment Guide
- To lower pH (more acidic): Add sulfur, coffee grounds, or use peat moss as your base
- To raise pH (more alkaline): Add garden lime (calcium carbonate) or wood ash in small amounts
- To test pH: Use an inexpensive soil pH meter or pH test strips worth every penny
How to Maintain and Refresh Indoor Container Soil Over Time
One thing I wish someone had told me earlier: soil doesn’t last forever. After a season or two, even the best container mix starts to break down, compact, and lose its nutritional punch.
Recognizing when to refresh your soil and knowing how to do it is what separates gardeners who keep improving from those who give up and assume they have a brown thumb.
Signs Your Container Soil Needs Refreshing
- Water sits on top and drains slowly a sign of compaction
- Plants grow slowly despite good light and regular watering
- Soil shrinks significantly below the container rim after watering
- A white crusty layer appears on the surface (salt buildup from water and fertilizer)
- Plants look pale or yellow without obvious overwatering or underwatering
How to Refresh Without Replacing Everything
You don’t have to throw out all your container soil every season. Instead, try these refreshing strategies:
- Top dress with compost: Add a 1–2 inch layer of fresh worm castings or aged compost on top. Water will carry nutrients down into the root zone over time.
- Loosen and aerate: Use a chopstick or small garden fork to gently break up compacted soil around the edges without disturbing roots.
- Flush out salts: Every few months, water deeply until water runs freely from the drainage holes for a minute or two. This flushes accumulated mineral salts.
- Add fresh perlite: Mix in a handful of perlite when repotting to restore aeration capacity.
- Full replacement: Every 1–2 years, start fresh with a new mix. Old soil can harbor pathogens and loses its structure permanently over time.
Common Soil Mistakes Indoor Vegetable Gardeners Make
Even with good intentions, it’s easy to make soil decisions that quietly sabotage your indoor garden. Here are the most common pitfalls and how to avoid them.
| Mistake | What Happens | How to Fix It |
|---|---|---|
| Using garden soil indoors | Compaction, root rot, pests | Always use a dedicated potting mix |
| No drainage holes in container | Water accumulates, roots suffocate | Always use containers with holes; add a saucer |
| Too little perlite | Soil stays soggy between waterings | Always add at least 20% perlite to any mix |
| Overfilling the container | No room for watering without overflow | Leave 1–2 inches of space at the top |
| Skipping pH testing | Nutrients locked out, stunted growth | Test pH before planting and adjust as needed |
| Reusing diseased soil | New plants get infected immediately | Always start with fresh mix after any disease |
| Not fertilizing at all | Soil depletes quickly in containers | Feed every 2–3 weeks with balanced liquid fertilizer |
Fertilizing Your Indoor Container Vegetable Mix
Even the most carefully crafted soil mix will eventually run low on nutrients especially in the confined environment of a container. Unlike outdoor gardens, where plants can send roots outward to find nutrition, container plants are entirely dependent on what’s in the pot and what you add over time.
A good baseline approach is to use a slow-release granular fertilizer worked into the soil at planting time, then supplement with a balanced liquid fertilizer every two to three weeks during the growing season. Organic options like fish emulsion, kelp meal, or liquid worm casting tea are popular among indoor gardeners who prefer to avoid synthetic inputs.
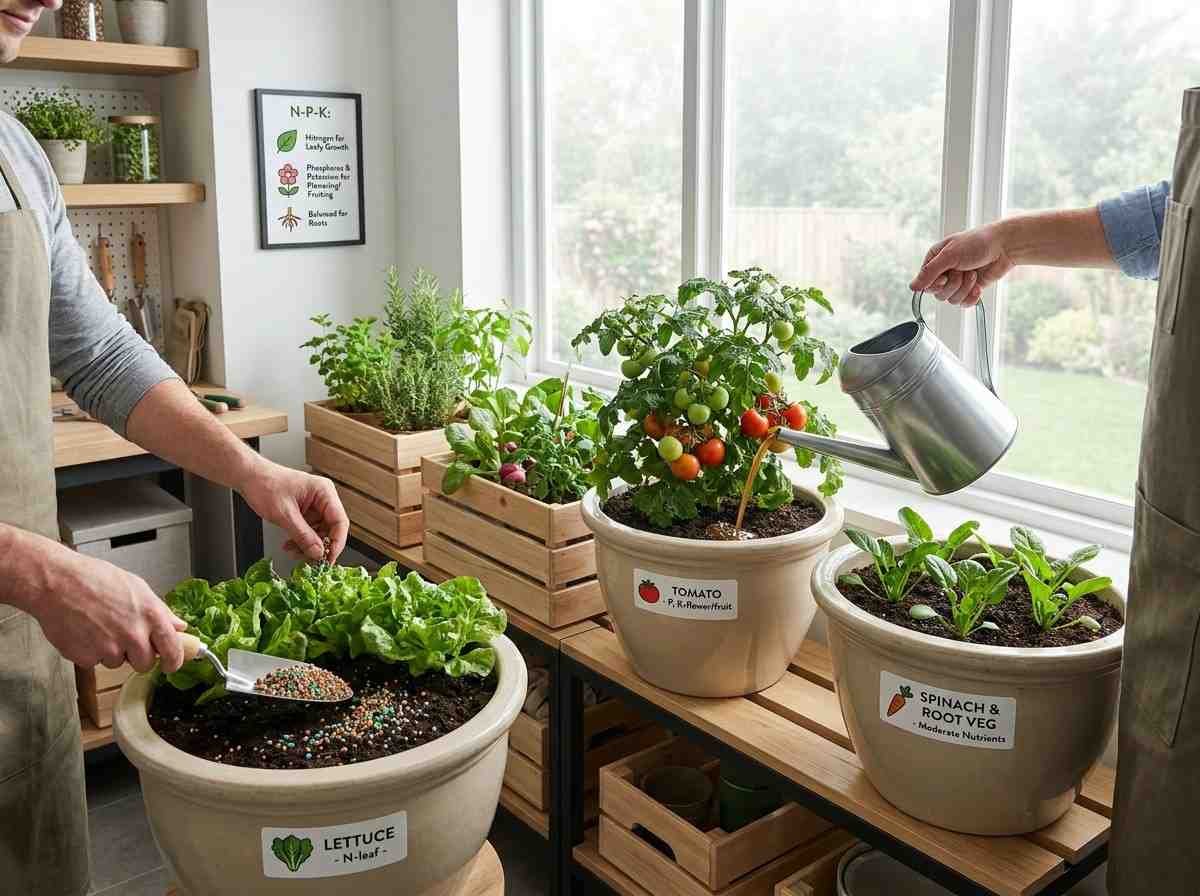
Fertilizer NPK Quick Reference for Vegetables
- Leafy greens (lettuce, kale, spinach): Higher nitrogen (N) promotes leaf growth
- Fruiting crops (tomatoes, peppers): Lower nitrogen, higher phosphorus (P) and potassium (K) supports flowering and fruiting
- Root vegetables (carrots, radishes): Lower nitrogen, moderate phosphorus excess nitrogen pushes leaf growth over root development
Fertilizing indoors feels more nuanced than outdoor gardening, and honestly, that’s part of what makes it interesting. You become more attuned to your plants you start to read the leaves, notice the color shifts, and learn what each plant is telling you. It’s a slow education, and one that pays off deeply over time.
Frequently Asked Questions
Q1. Can I use regular potting soil for indoor container vegetables?
Regular potting soil can work but often compacts quickly and lacks adequate drainage. Always amend it with extra perlite (20–25%) and compost for better indoor container vegetable performance.
Q2. How often should I replace the soil in my indoor vegetable containers?
Replace container soil fully every one to two years. In between, top dress with compost and flush accumulated salts seasonally to keep the mix healthy and nutrient-rich throughout.
Q3. Is coco coir better than peat moss for indoor vegetables?
Both work well. Coco coir is more sustainable and slightly more neutral in pH. Peat moss is widely available and slightly more acidic. Your choice depends on availability and personal environmental preference.
Q4. Why is my indoor vegetable container soil always wet and soggy?
Soggy soil usually signals poor drainage too little perlite, no drainage holes, or overwatering. Add 20–30% perlite to your mix and ensure containers always have proper drainage holes at the bottom.
Q5. Do indoor container vegetables need a different soil pH than outdoor plants?
No, the target pH range is similar 6.0 to 7.0 for most vegetables. However, indoor containers need more frequent pH monitoring since nutrients deplete faster and salt buildup can shift pH quickly.
Final Thoughts
Growing vegetables indoors in containers is one of the most rewarding things you can do as a home gardener and the soil you choose is the foundation that determines whether that effort succeeds or stumbles. The best indoor vegetable container mix drains well, holds just enough moisture, stays airy and loose, and keeps your plants fed throughout the season.
Whether you build your own blend from coco coir, perlite, and worm castings, or start with a quality bagged mix and amend it sensibly, the key is understanding why each component matters. When you understand the soil, you stop guessing and start growing with confidence.
Every thriving indoor garden started with someone paying attention to the basics. Soil isn’t glamorous, it’s not as exciting as choosing seed varieties or setting up grow lights but it’s where the real magic happens. Get the soil right, and everything else becomes so much easier. Your plants will tell you: they’ll grow taller, taste better, and look like they actually want to be alive. And that, honestly, is what this whole thing is about.